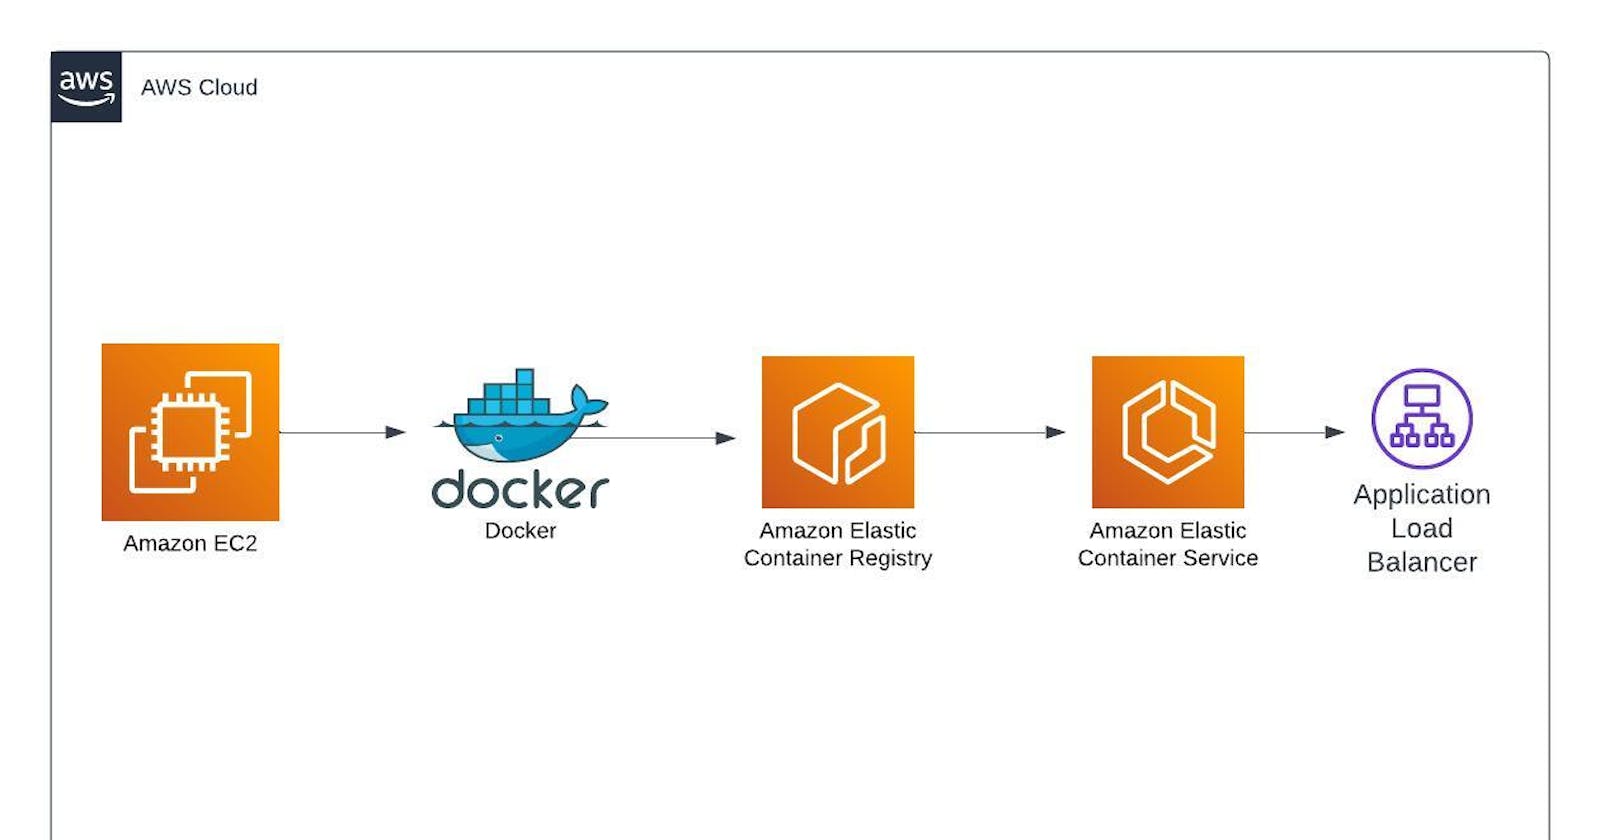
Introduction.
In the fast-paced world of modern software development, containerization has emerged as a transformative force, enabling developers to build, package, and deploy applications with unprecedented speed and efficiency. And at the forefront of this container revolution stands Amazon Elastic Container Service (ECS), a powerful orchestration platform that empowers you to seamlessly deploy and manage containerized applications.
This article is a walkthrough on how to "dockerize" an app and deploy via Amazon Elastic Container Service (ECS).
Prerequisites.
AWS account.
Docker Installed on EC2 instance.
Mobaxterm or Putty to connect to EC2 instance remotely.
Steps.
Log in to AWS and navigate to EC2 to create an instance, not forgetting to attach a key pair to the instance.

Using the SSH client option to connect remotely to the instance.

Using Mobaxterm to connect remotely to the instance via SSH by specifying the public IPV4, username, and path to the key pair.

SSH is successful when tested using the
whoamicommand.
Install Docker using root privileges and yum.

Docker installation is complete.

Start Docker using
systemctland ensure it is active.
Create a directory, navigate to this directory, create a Dockerfile (a text document that contains all the commands a user could call on the command line to assemble an image), and input the command below using any preferred editor (I used the Vim editor).

Create and edit an index.html file.

Build the image using the
docker build -t command <image-name> .(. means in the current directory).
Build is complete, and Centos is the base image.

Run the commands below to view docker images (
docker images) and running containers (docker ps -a).
Run the app using public DNS.

Navigate to ECR on AWS to create a private repo where the built image will be pushed.

Create a role for an IAM user (with programmatic access) for ECR.

Configure credentials (access key and secret access key of the user) using
aws configure.
Use push commands from the ECR repo to push my image to ECR.

I had issues continuing as a non-root user while trying to log in.

I switched to the root user using
sudo sucommand, and log in was successful.
Using
docker imagescommand to check my images and tag them before pushing them to ECR.
I pushed my image to my private repo on ECR.

My image is visible on Amazon ECR (ECR is a registry for images).

More details about my image.

Create a target group to attach to an application load balancer (notice the target group is not associated with an LB yet).

Create an application load balancer (summary of my ALB details).

ALB is active with high availability (more than 1 AZ).

Create a task execution role that grants the Amazon ECS container and Fargate agents permission to make AWS API calls on our behalf.

Create a task definition that describes the containers that form my application.

Create a cluster, which is a group of ECS container instances.

Create a service that defines the minimum and maximum tasks from a task definition.

A list of tasks using fargate as the launch type (a task is an instance of a task definition).

This shows deployment and events for ECS.

Using ALB DNS to view my web app.

To avoid being charged, I cleaned up my resources by terminating my instance and deleting other resources.
Thank you for reading, and feel free to connect with me on LinkedIn and Twitter.
