Deploying an Application on Kubernetes.
I have experience building highly accessible, scalable, and reliable cloud infrastructure and have experience with AWS, Linux, Git, Docker, and Kubernetes. S3, EC2, CloudFormation, CloudFront, Auto-Scaling Group, Elastic Load Balancer, IAM, Cloud9, VPC, RDS, Route53, and other AWS services are just a few of the ones I am familiar with. I have experience building CI/CD pipelines, high-availability web apps, and websites. I'm excited about designing, implementing, and automating cloud-based apps while utilizing best practices like configuration management, continuous integration, and deployment.
Introduction
Kubernetes is an open-source technology used to autonomously deploy, scale, and manage applications that use containers. It is a popular container orchestration solution since it enables the control of several containers as a single entity as an alternative to managing each container separately.
This is a walkthrough of deploying an application to Azure Kubernetes Service (AKS)
What will be covered?
Azure Kubernetes Service
Azure Container Registry
Docker Container
Azure CLI
Kubectl
Simple Node app
Overview
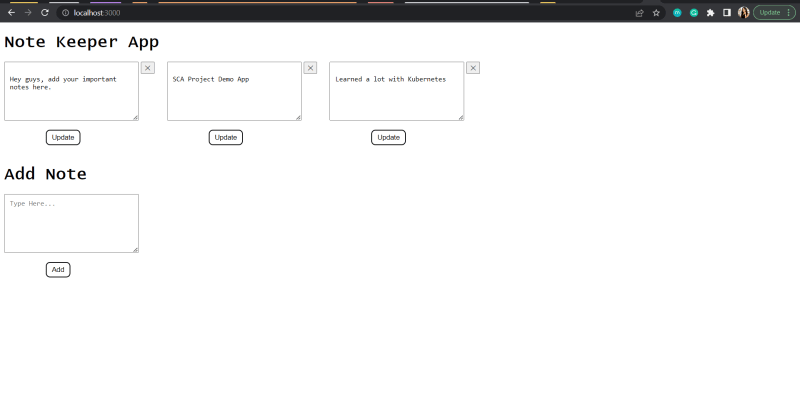
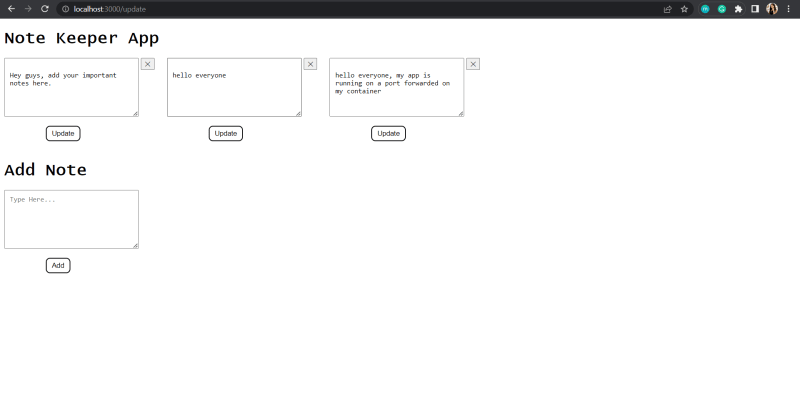
A note keeper app written in node js will be containerized and pushed to ACR, after which one Kubernetes cluster will be created on AKS, and a deployment and a service will be created with 4 pod replicas via a manifest file.
Prerequisites
Terminal and Azure CLI installed on local machine - some of the steps for this project (such as connecting to kubernetes cluster will be done using Azure CLI).
Docker installed on local machine - which will be used to build an image and push to a registry (Azure Container Registry in this demo).
Azure account with active subscription.
Code Editor or IDE - which will be used to write code that will be containerized.
Terraform installed - an IAC tool that will be used to provision infrastructure on Azure.
Note: The required services can be created using either terraform, Azure portal or Azure CLI.
Getting Started
Testing sample app locally
Write the code or fork and clone app from Github
Navigate to application folder on terminal using
cd <foldername>Install dependencies using
npm installRun app to test using
node <filename>ornpm <filename>
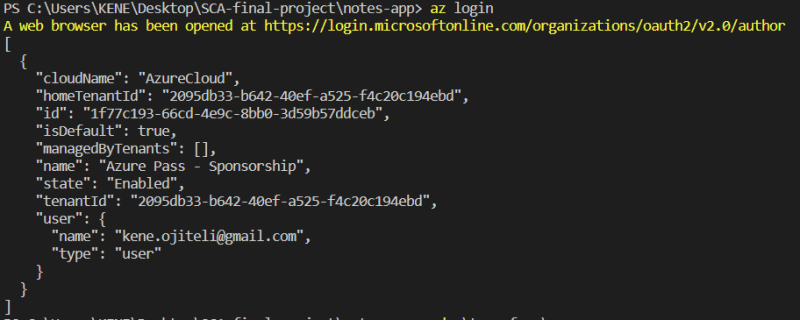
- Login to azure using
az loginon terminal.
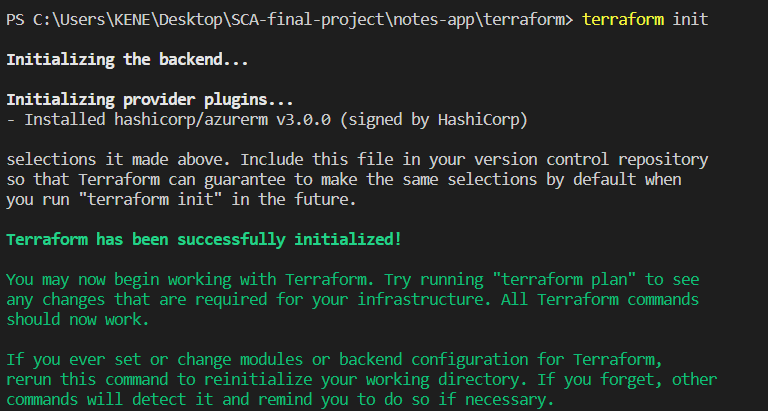
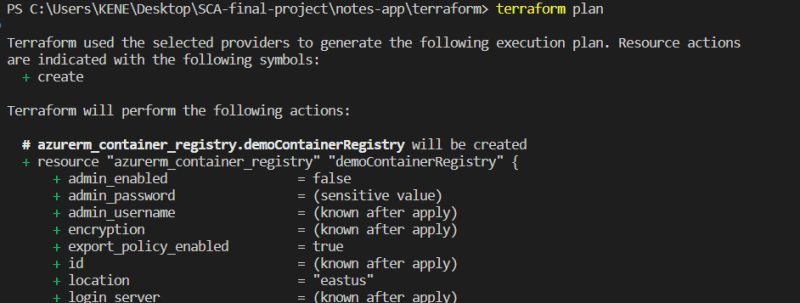
- Provision infrastructure on Azure with terraform using the following commands:
terraform initterraform fmtterraform validateterraform planterraform apply(note that a terraform file has a .tf extension)

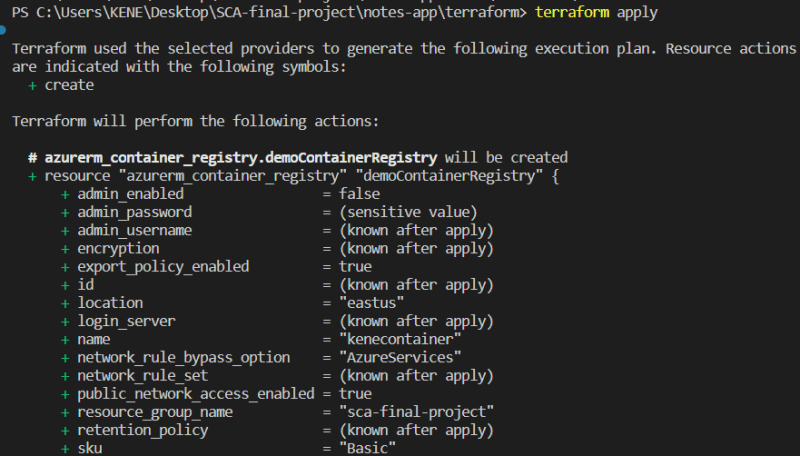
Head to azure portal to confirm if infrastructure is provisioned
Containerize the application
After resources have been provisioned on azure, we need to login to ACR using credentials (which includes login server, username and password) from
container registry => settings => access keysNavigate to your project directory via terminal and login using the details from the step above
docker login <login server> --username <username> --password <password>Build docker image using this command
docker build -t <name>:<tag> .where.is the current directory.

Check the image exists using
docker imagescommand ( this lists all available images, the first image is my newly created image).
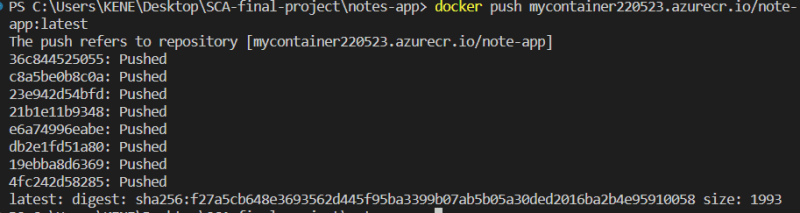
Push the image to ACR using
docker push <name>:<tag>
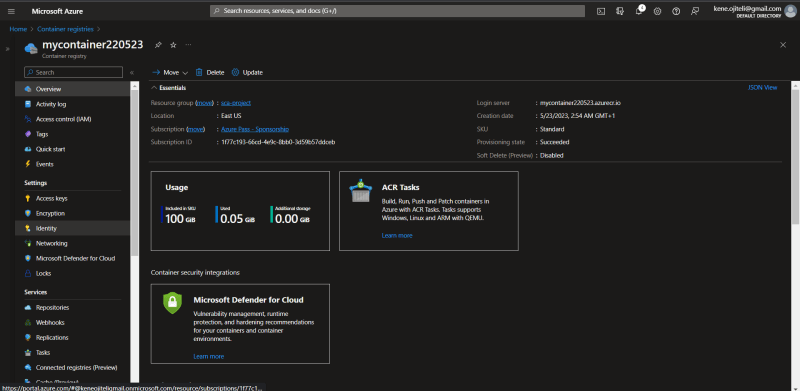
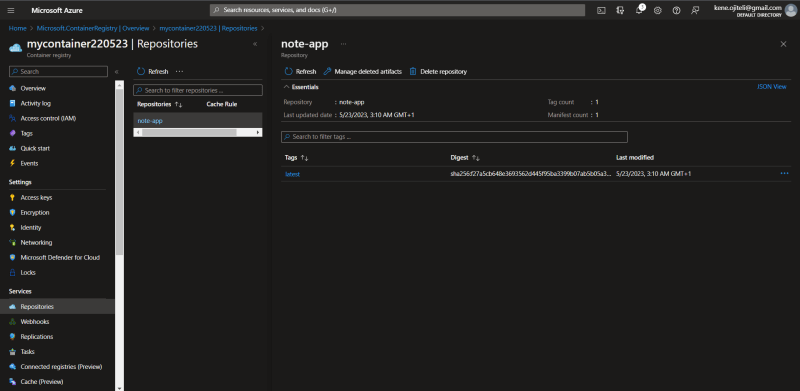
- Going over to
azure portal => container registry, to verify the push is successful.
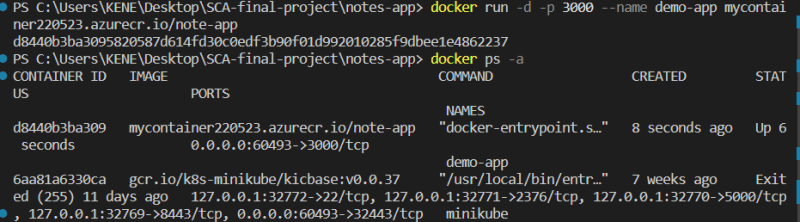
- I created a container using my image (exercising how to forward ports, run container in a detached mode, give container a specified name and run the app using the forwarded port on my local machine)
Connect to Cluster
- kubectl will be used to manage the Kubernetes cluster. Run the command
az aks get-credentials --resource-group <resourcegroupname> --name <clustername>to configure kubectl and connect to the cluster we previously created and also verify connection usingkubectl get nodesto return a list of the cluster nodes.

Kubernetes Deployment: A Deployment is one of the Kubernetes objects that is used to manage Pods via ReplicaSets in a declarative way. It provides updates, control as well as rollback functionalities. This deployment file will be used to:
Create a deployment (which automatically creates a replicaset), service and pods.
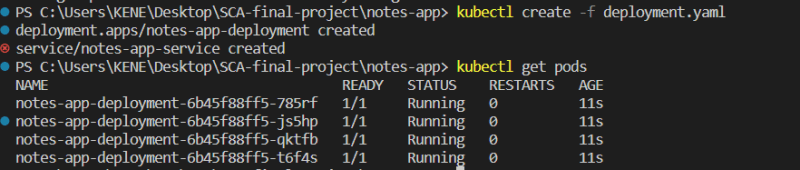
- Lists all objects created at once using
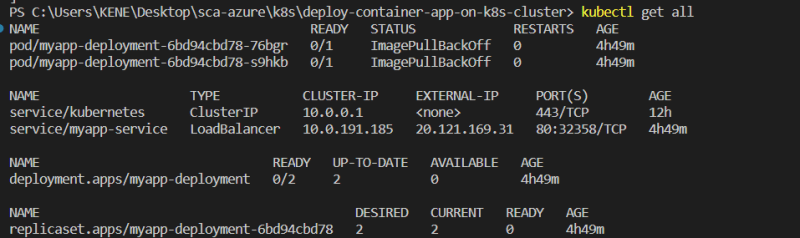
kubectl getcommand

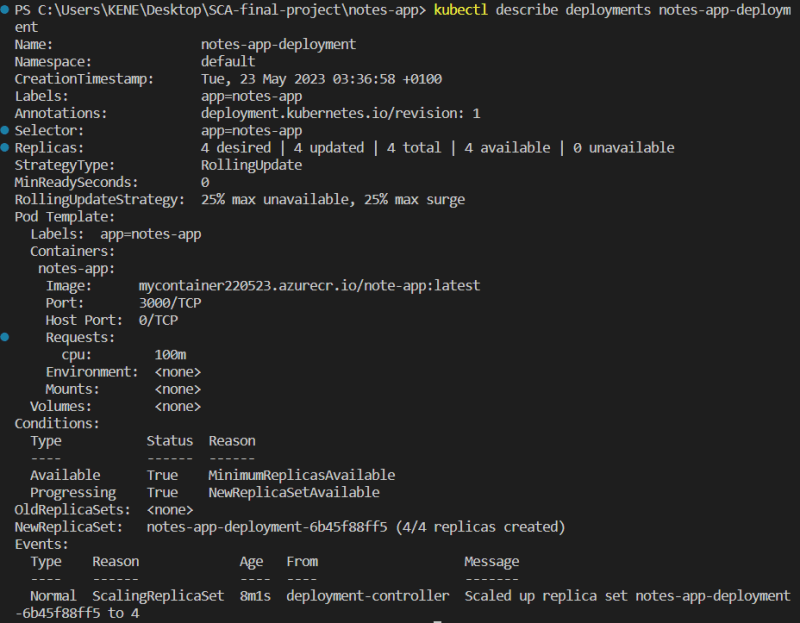
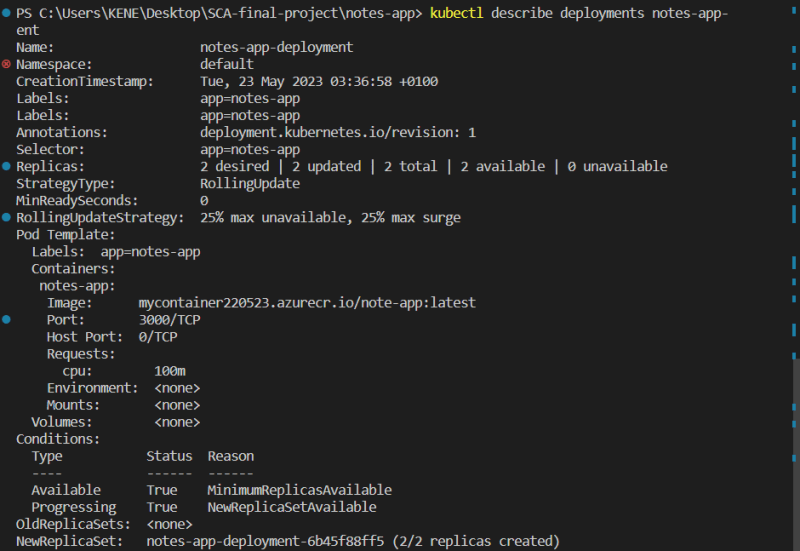
- To get more details about the deployment, use
kubectl describe deployments <deploymentname>command
- Scale down replica set from 2 to 4
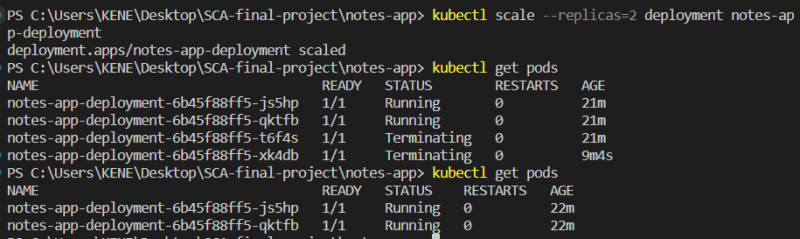
- And also see the change in the events log

- Deleting a pod and showing how a deployment always ensures the desired number of pods is always present.

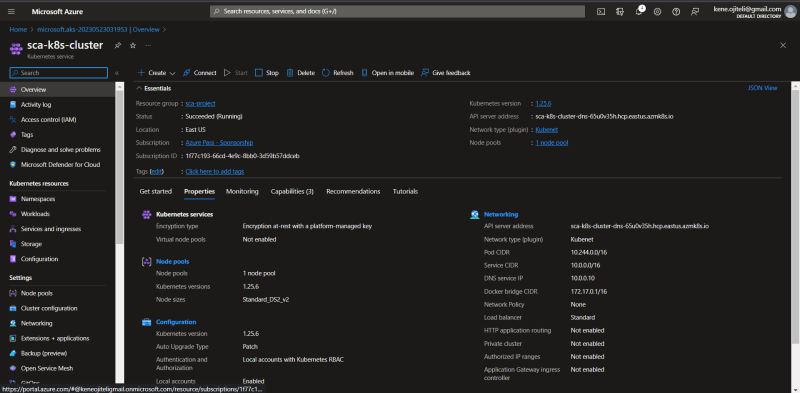
- Head to
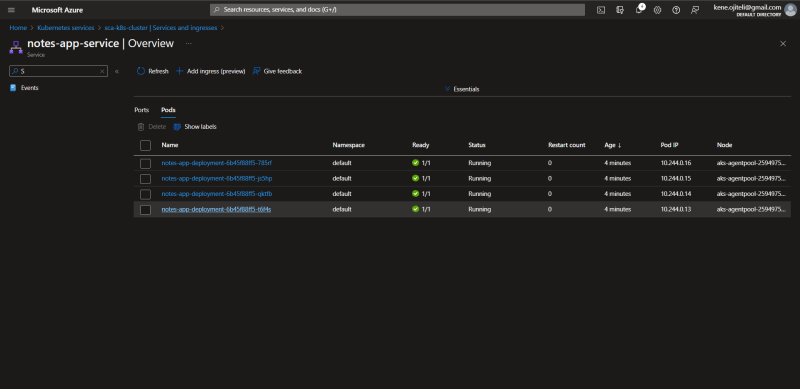
azure portal => kubernetes cluster => kubernetes resources => services and ingressesto view ports and pods.
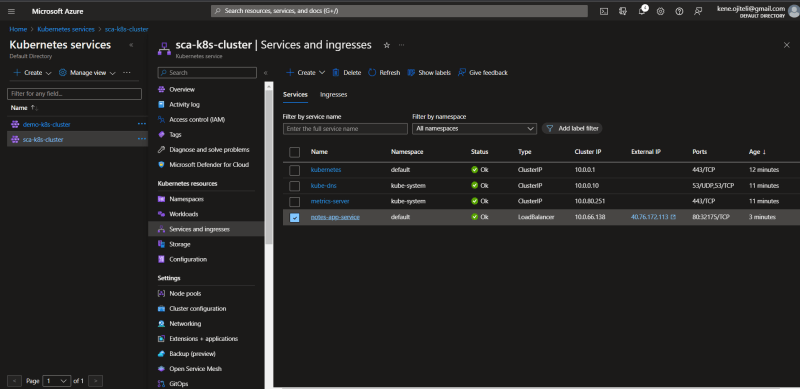
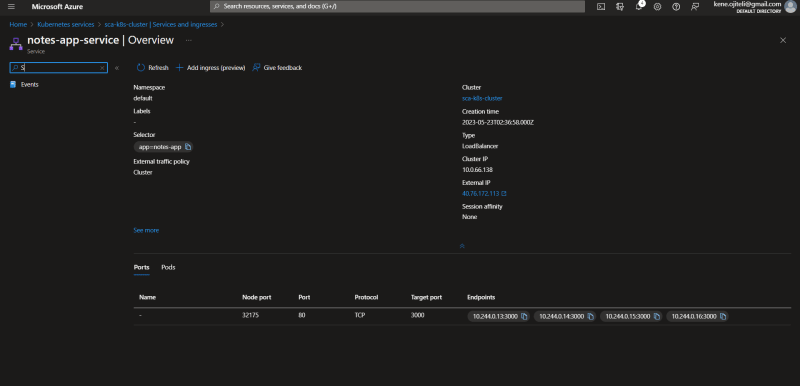
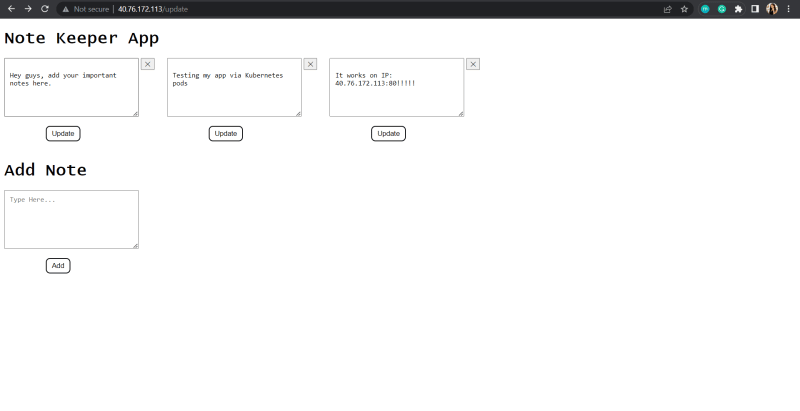
- The app can be accessed using the external IP of the service.
Challenges encountered during this project
Creating a new Azure account due to credit card issues
I encountered the
ImagePullBackOffandErrImagePullerror which was as a result of not properly connecting my Azure container registry to my Kubernetes cluster; this was detected while debugging.
- Changing my demo app from a note-keeper app to a basic node app and back to my note-keeper app due to
ImagePullBackOffandErrImagePullerror.
Conclusion
This tutorial shows how to:
Create a Docker image for a node application
Push the image to ACR.
Deploy on Kubernetes
The End.
Thank you for reading


